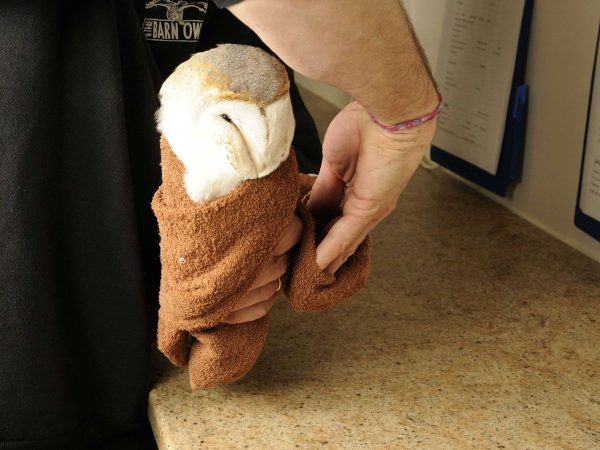
Wrapping owls like burritos helps keep them motionless so they can be more easily be examined, treated, fed, and medicated by a wildlife carer.
The following guide by Barn Owl Trust shows how to carry out this procedure effectively.
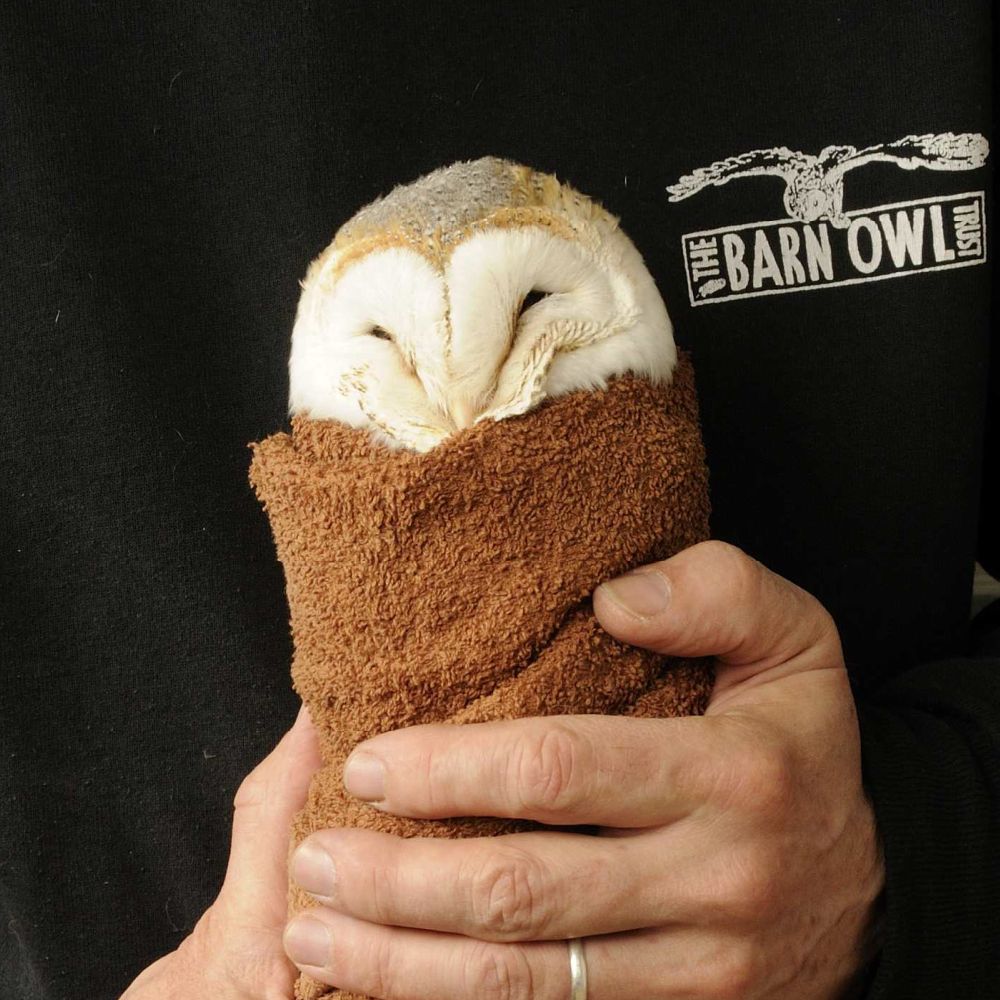
Photos: KEVIN KEATLEY
Before wrapping an owl, it is recommended you first read the guide to the short-term care of a wild owl on the Barn Owl Trust website.
THE DEFINITIVE GUIDE ON HOW TO WRAP AN OWL
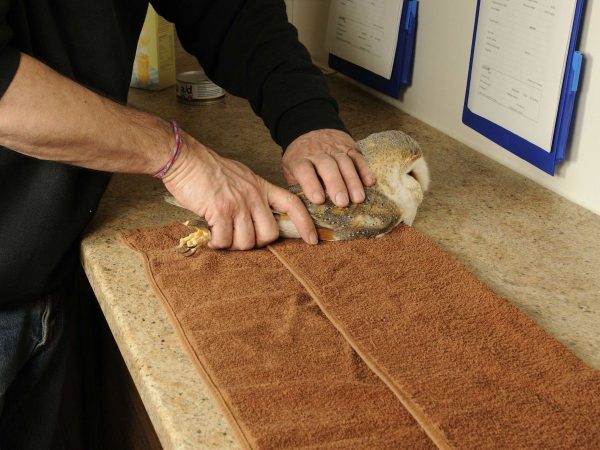
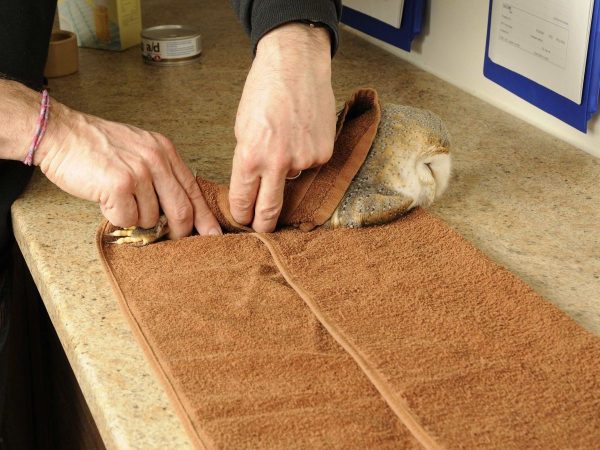

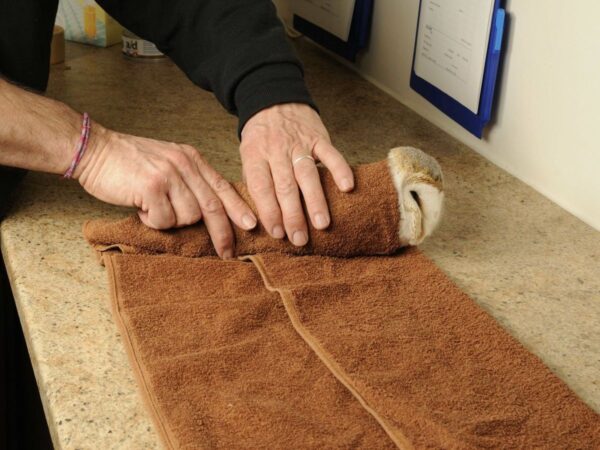

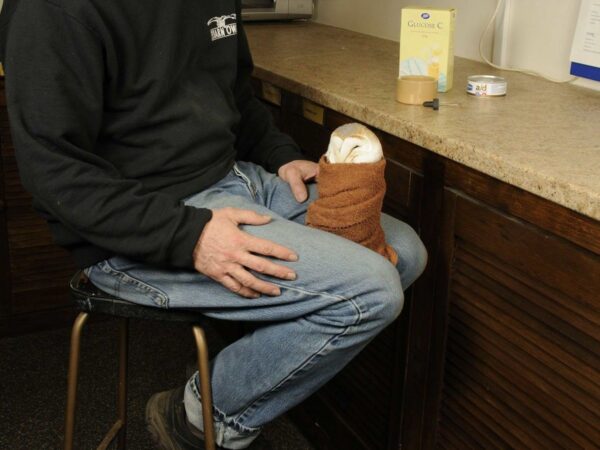
Step 0 – Before wrapping the owl, prepare everything you will need (fluid, cut-up food, etc.) and place everything within reach of a chair or a stool with a foot rest (see final picture). Lay out a fairly thin folded towel on a table, so that it is a little wider than the owl’s length and about three times as long.

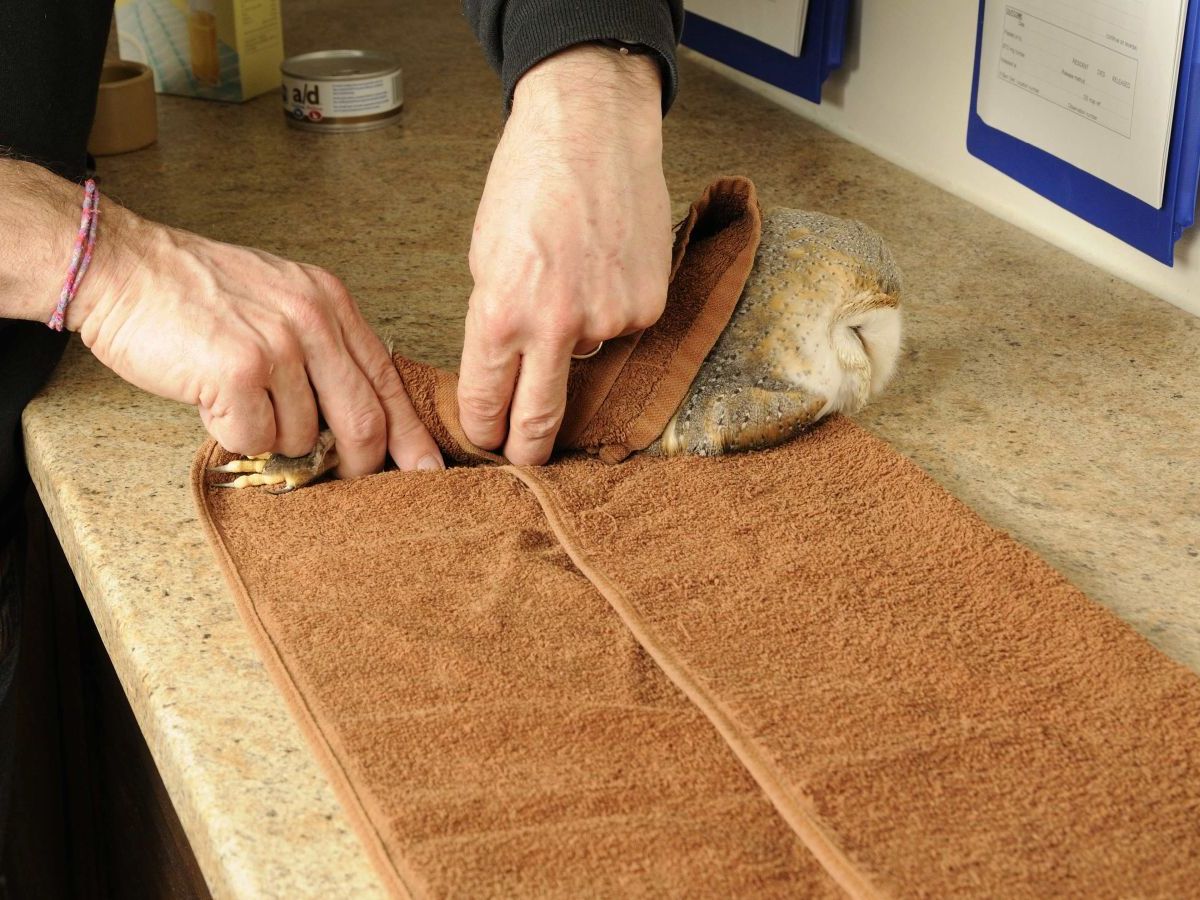
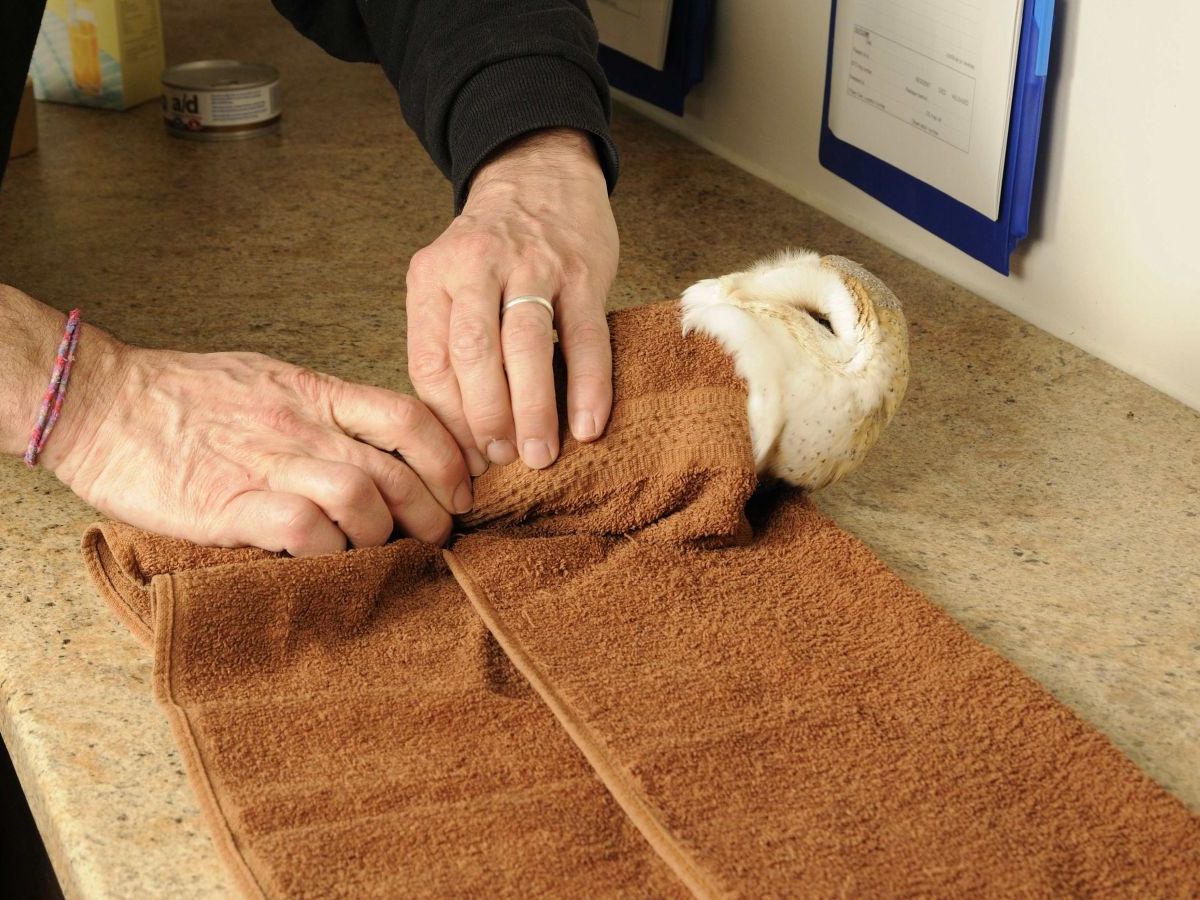

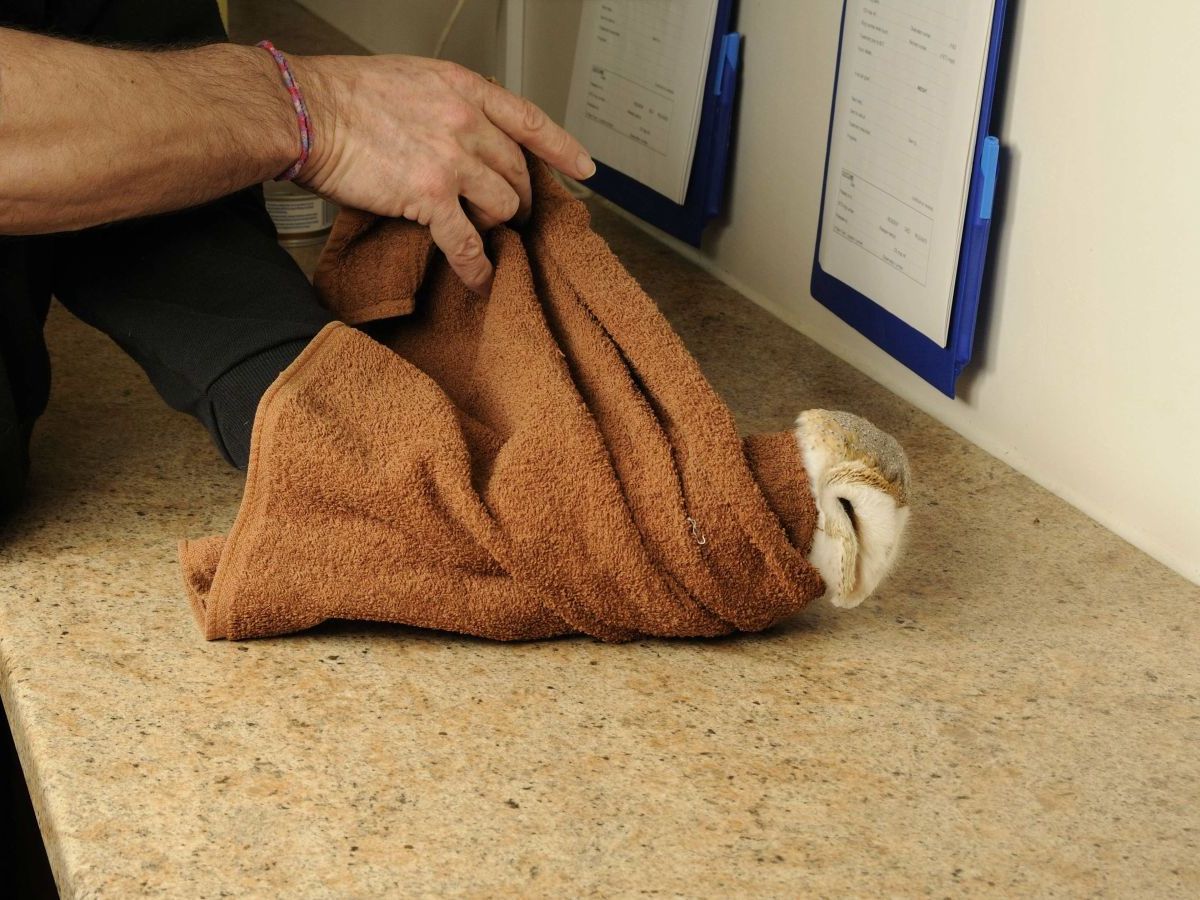

Position the owl side-on so that it faces the hand that will feed it (or administer the fluid). Your other hand will start this procedure by coming in from behind, over the owl’s head, and grasping the upper mandible between thumb and index finger.
Additional Notes
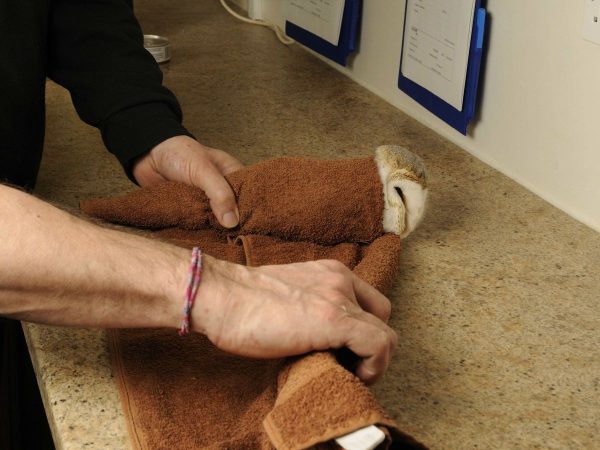
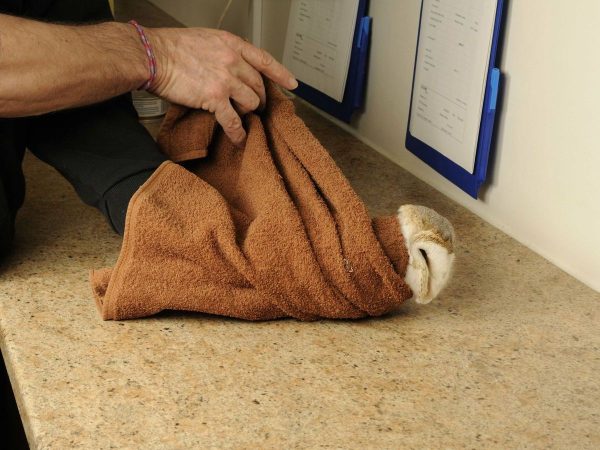
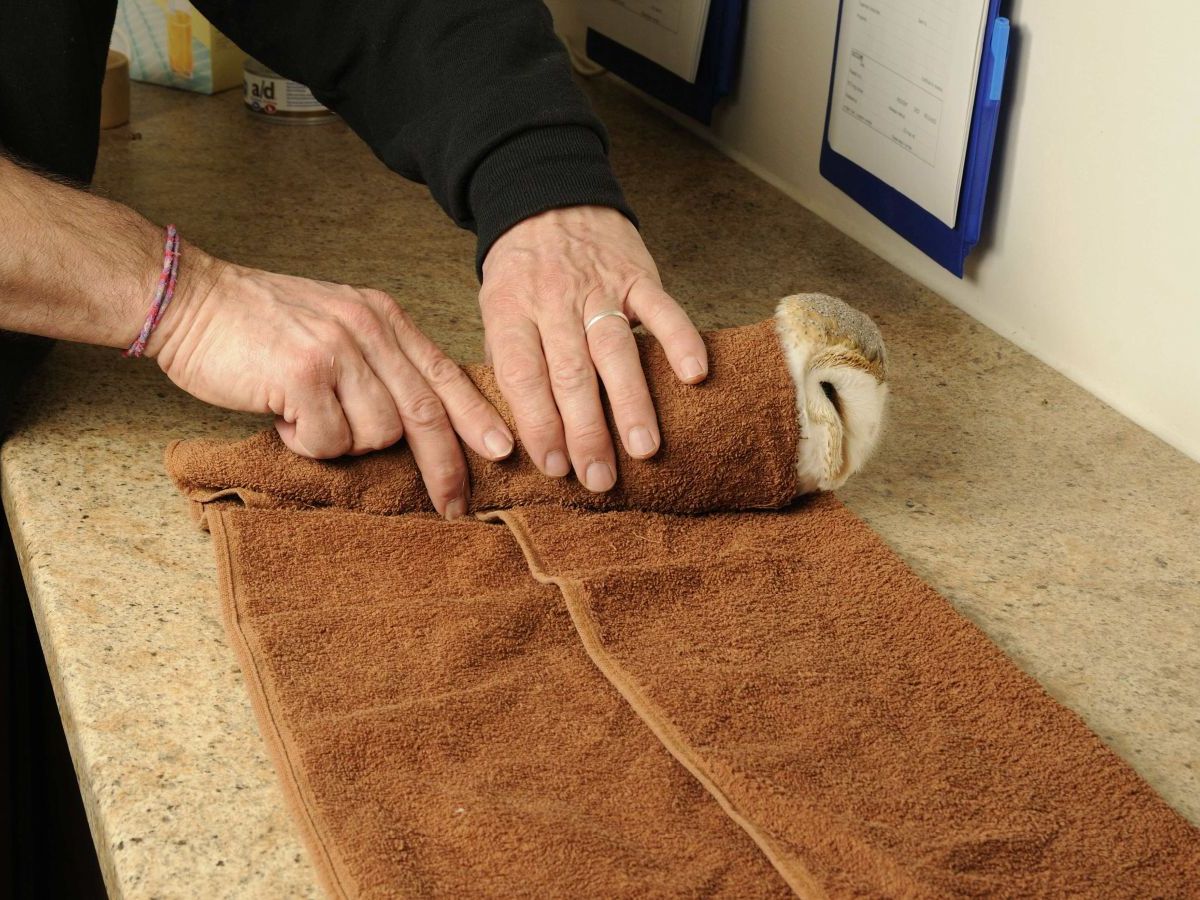
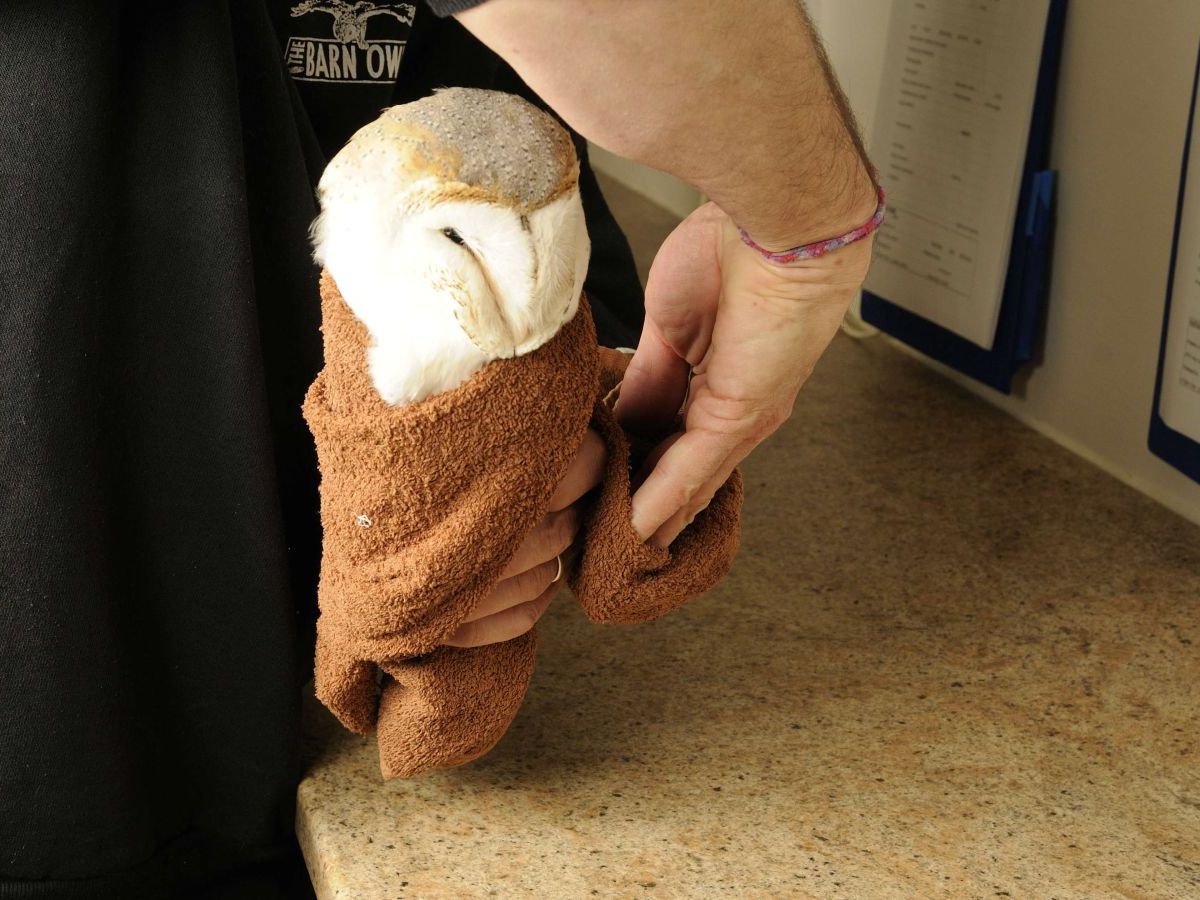
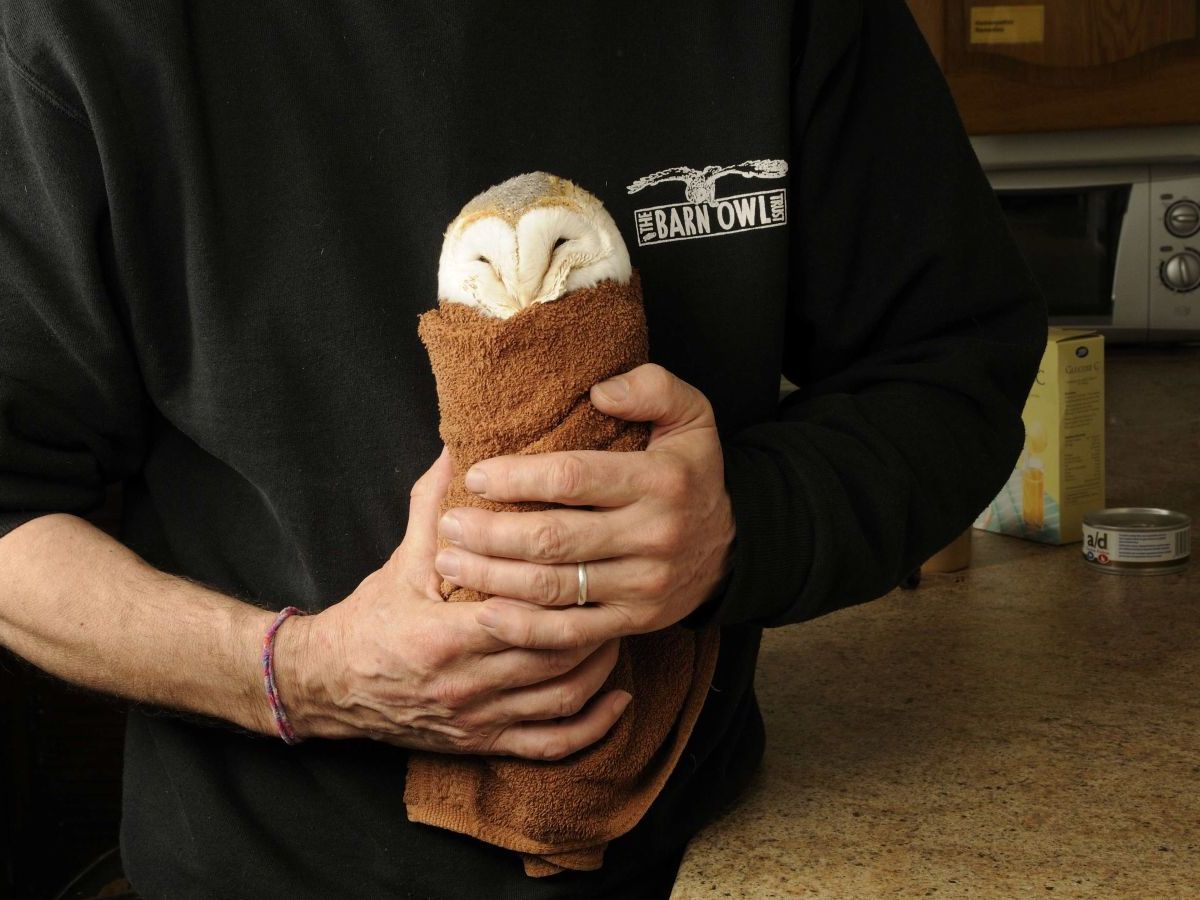
The reason this method of towel wrapping works well is because the legs are kept straight. If the initial wrap is allowed to slip loose the bird will raise one of its feet, grip the towel, and push its way out. If this happens, simply re-wrap the bird, paying more attention to the tightness of the initial wrapping around both legs, wings and tail. It is perfectly acceptable to towel-wrap a bird with a wing injury (because the wing will be kept in the naturally folded position). However, great care obviously needs to be taken when wrapping a bird with a leg injury (because the legs will be straightened). In such cases, getting a helper to hold the bird (rather than wrapping it) may be necessary.
FURTHER INFORMATION

A big thank you to the The Barn Owl Trust for authoring the above guide. See their further resources on owl care, including:
Note: These guides are intended for owl care in the UK. Guidance should be adapted for local owl species and wildlife regulations.
💛🦉
xo owlsintowels